"He that would perfect his work must first sharpen his tools."
Confucius


The type of photographs you make, the subjects you single out, reveal the person inside of you.
How close you get to your subjects reveals how close you want to get.

Highslide JS
Pcam Program by David Eubank.


Questions arise from time to time "What is the Depth of Field (DOF)when used and focused for infinity, with the aperture on f2.5 "
The answer is 121 meter and the Hyperfocal is 134 meter. This means if you would be able to focus at 134 meter, Near point of sharpness will start at 67 meter. Sharpness is thus from 67 meter till infinity. (Hyperfocal divided by 2)
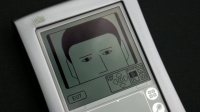
You can see the settings on a screendump of my pCam program on my Palmtop.
  Beyond the 6 feet barrier...
What's going to happen with portraits?

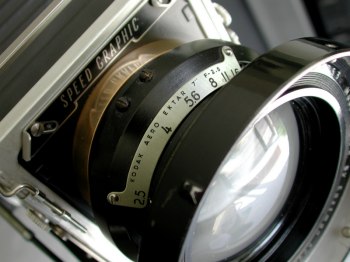
A rule exists that says doing portraits within 10 times the focal length should not be tried or done. Why? The venerable Aero Ektar was designed for Aerial Photography. So, there is this hard to conquer misunderstanding: "The Aero would be suited only for infinity shots." "It can't be used on shorter distances as it is corrected for infinity only". Buyers of the Aero Ektar probably own a B-17 also :-). Actually, there are plenty of myths and fairytales about this lens.
I don't give a hoot in hell for the men who tell this crap, as it is just horsedump...any taking lens is corrected for infinity except process lenses (Corrected for 1:1) that is!
On with this free seminar...
The Aero Ektar 178 will focus from 6 feet till infinity, no problem about that. For this lens 10x178 mm = 178 cm (approx. 6 feet) is the critical zone.
This indeed equals 10 times the focal-length and yes it is no fairytale, from this point you have to take bellows draw into account!! What will happen, if possible at all, when we go through this theoretical barrier?

Subjects within this range tend to show a distorted perspective of view and exaggerated proportions. Should this stop us from doing the right thing on our search to strong emotional portraits?
No way...Shoot to your heart's content. I have learned that such is not the case with the AERO EKTAR! Try out yourselves. However there are some pitfalls and caveats, so read on....

Note #1: The enemy of photography is the convention, the fixed rules of 'how to do'. The salvation of photography comes from the experiment!

Note #2: If you're looking for sharpness all over, shell out some more $$$$$ for a longer focal length and stop reading. (Don't expect f2.5 - modern LF lenses start at f5.6)


Highslide JS
Pcam Program by David Eubank.


Above screendump is presuming a working distance of 90cm, measured or guesstimated from the center of the lens.
You can read: DoF-CoC- Near distance- Far distance - Hyperfocal all with working aperture f2.5
  Going down from 6 feet
What's going to happen with the sitter?

If you're looking for intimacy in a portrait, get in closer...but be warned the magic won't happen with the first shot.
However, it sure will help, if the sitter is familiar with photography in general, but in particular with LF photography. Imagine yourself sitting in front of a big machine with a huge glass eye looking at you from a very close distance. Behind this machine a photographer under a darkcloth, fumbling on several knobs... Would you feel comfortable? I doubt it.
The sitter must be comfortable with all the actions you have to complete before the actual exposure. Once you have focused and framed your image it must be understood that the least movement of the sitter will blow the focus.
The Range Finder is not working, so from the moment you've made the composition and focused on the closest eye or whatever you fancy to be the central point of interest, you must respond quickly and decisively to get the shot.(Requires practice,practice and some..).
Don't ever forget how alien a machine over a person's face appears. A photographer must be sensitive and caring so the mechanical act of recording light images is secondary to the union of spirit with the subject.!


Highslide JS
Pcam Program by David Eubank.


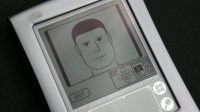
Above screendump is showing the actual field covered with a working distance of 90cm.
measured or guesstimated from the center of the lens.
  Going down from 6 feet
What's going to happen with the photographer?

  • If it's overexposed, you've blown it.
  • If it's underexposed, you've blown it.
  • If it's out of focus, you've blown it.
  • This is quite a pastime you've chosen here...
Is this still fun? Sure is...
"Expose for the Magic and develop for the surprises"


Highslide JS
Pcam Program by David Eubank.


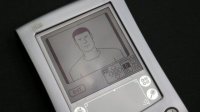
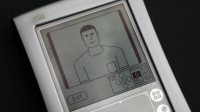
This is a preview what to expect with this setting.
As you can see there is also a cursor wheel to adjust the place of the head, as a matter of fact previsualizing will work also.
The program from which the screendumps are made is called Pcam by David Eubank and running on Palm PDA's.
  Going down from 6 feet
What's going to happen with the model?

The best way to get results as with all disciplines ...practice and practice some more....
Before even thinking of doing a spontaneous or formal portrait, you must have practiced the lot.
And remember since you're very close to the sitter, the sitter will notice your insecurity and smell your anxiety, maybe literally if you're prone to perspiring. You have to avoid this situation, so practice with someone you know very well to acquire some routine.

First of all choose your background, but you will notice this is not so important as with other distances. As a matter of fact, you can choose any ugly background.(For strong side-backlit scenes use a compendium!)
Secondly, adjust your tripod height and distance from the sitter, level it, mount the camera..and the real fun can begin.
Talk with your sitter, explain some things you're doing and what they can expect to see on film. (No need for the sitter to worry if his or her shoes are polished.
So far so good..relax.


Highslide JS
Pcam Program by David Eubank.


Above screendump is presuming a working distance of 70cm, measured or guesstimated from the center of the lens.
You can read: DoF-CoC- Near distance- Far distance - Hyperfocal all with working aperture f2.5
  Going down from 6 feet
What's going to happen with portraits and the sitter?

So, everything seems to be fine..
Now casually take a light reading as you would normally do (Reflected or Incident) Read the time at F2.5 and memorize. Set the aperture at f2.5.
Concentrate on your next move while directing the sitter how to look or not to look, face left, face right etc....
Make your composition and focus. (From this moment the sitter must not move any more...) Once you are satisfied with the before going, prepare for the exposure. (the decisive moment.) While taking your film cassette or preloaded Polaroid holder, let your mind walk the procedure...


Highslide JS
Pcam Program by David Eubank.


Above screendump is showing the actual field covered with a working distance of 70cm.
Measured or guesstimated from the center of the lens.
  Going down from 6 feet
What's going to happen with the film?

Set your shutter time before inserting your cassette and withdrawing the dark slide.
Next remove the dark slide and expose in one smooth action while monitoring your model. Reinsert the dark slide. That's it...start praying...You're done!


Highslide JS
Pcam Program by David Eubank.


This is a preview what to expect with this setting.
As you can see there is also a cursor wheel to adjust the place of the head, as a matter of fact previsualizing will work also.
The program from which the screendumps are made is called Pcam by David Eubank and running on Palm PDA's.
  Going down from 6 feet
What's going to happen with the finished portrait?

Congratulations, you just experienced a close encounter with your sitter.
Don't get overexited as a lot can go wrong...

But of course you knew all this huh? Anyhow for your convenience I've put some screendumps from my Palm on the left.
A lot of information and settings can be learned from it.
Notice the extreme shallow depth of field depending on how close you will go.
Finally, I wish you lots of fun and don't hesitate to share your success with me. I am looking forward to it.


Highslide JS
Dadaa, Femke and Boukje - Autoportrait
Highslide JS
What happened to my kids? As the old sing, twitter the young!
My son is using a combo also...
Highslide JS
JohnDesq for measuring light ...
If you really must know who talked the talk...
rest assured we did walk the walk!

Quote:
The illiterate of the future will be the person ignorant of the use of the camera as well as the pen.
(Not to mention exposure metering)


WELCOME TO THE MACHINE...
"When you use a camera, not as a machine but as an extension of your heart, you become one with your subject."

Speeding up...
The easiest and fastest way...

Many ways can lead to Rome, but I've come to learn this procedure is the fastest way and the ideal one to reproduce the same view later on. Instead of a lot of fumbling, focusing and guessing, I will give you 3 pre-calculated settings.
First of all, get the front flush with the bed as shown on the picture on the left.

NOTE: The 3 pre-calculated settings are valuable only if you have your Aero Ektar mounted according Mod II (Lommen)
See "Modding the lighttrap" here

Setting #1 Distance 45cm...
Click both icons for preview
Highslide JS
Preset 1
Highslide JS
The easiest and fastest way...

Lock the rail so it stays flush with the bed. Disengage the infinity stops and pull lens standard out till the frontpanel is flush also. (See image)
This setting will result in a distance from point of focus to the middle of the aero - 45cm.
Bellows draw is 29cm (correction 1.4 stops down or multiply your time by 2.65.)
Covered image area 16x22 cm.
Move your tripod to your subject without altering the positon of the lens until you have the point of interest in focus. Now fine tune with the focus knob on either side....Do the same for the following distances.

If you want to do your own conversions...
Launch my calculator

Highslide JS
Ready for a 65mm distance.....Give 1stop more exposure
Setting #2...Distance 65cm ...
Click both icons for preview
Highslide JS
Preset 2
Highslide JS
The easiest and fastest way...

With this setting, adjust the lens standard till it lines up with the inf. mark on the left side.(See image)
Now we have a distance of 63cm and a bellows draw of 26cm. (correction 1.1 stops down or multiply your time by 2.13.)
Fine adjustment can now be done with the focusing knob.

Covered image area 27x34 cm.
Click on image left - adjusted for 65mm.

Setting #3... Distance 98cm....
Click both icons for preview
Highslide JS
Preset 3
Highslide JS
The easiest and fastest way...

This is the most forgiving distance as far as DoF is concerned.
Mark the rail as shown about 68mm from the front. This will give a distance of 98cm and a bellows draw of 23cm. (Correction 0.7 stops down or multiply your time by 1.67)
Covered image area 45x57 cm.

NOTE: Find more formulas here page.

Highslide JS
f2.5 The holy Grail...is it really?
Magical f2.5 - The looks of this one really can scare off the digital Photographer.

Acknowledgement:
Handcoded and designed by JD
PDA and Camera images were shot on D-lux 3
Original Polaroid Images were scanned on the Epson Perfection V700.
Resized and adapted for the 3W.

Highslide JS

D-lux 3
Highslide JS
Epson V700 - Lightroom acc.
Highslide JS
Max Extension...380mm For 1:1 you need only 356 (Give 2 stops more)

Highslide JS
Detail of bubblelevel placement
Recap and some...
The magical f 2.5..

Is this aperture of f2.5 really the holy grail? You have to decide...Try to stop down to f4.0 or 5.6 and see what works best for you.
What will the image look like if stopped down to f16.0? Looking for sharpness or bokeh? It is a personal taste, but one thing is certain...till now there is no PhotoShop filter that will do it for you!
I've used quite a few of modern plasmats but also older lenses. Modern lenses are are pretty sharp wide open. But that's really beside the point. What the Aero Ektar 7In has to offer goes beyond sharpness. This lens has such a beautiful look when shot wide open. Since shooting fast lenses wide open is antithetical to most LF practice these days, I'm afraid the only option you have is experiment...
We advise to start with preset III, as it will be the most forgiving..(Lack of DOF). With settings I and II, not much difference will be seen when you stop down one or two stops but it will give that extra mm ....

Get the Max, right in your face, get your hands dirty and get that shot.
Enjoy, and let me know if this was of any help.

Driebergen, Aug 23 rd 2007    Highslide JS

Unmistakable a Photog's luncheon :-)


Some elder, some recent images to illustrate the proportions and covered image area. It may be clear now that a coupled RF is of little or no use at all.
Instead check your GG and eventual placement of a Fresnel or Ektalite screen. If you work wide open, you can imagine this is very crucial to get the plane of focus where you want it!!


Highslide JS
example 1 Pol type 56 1/500 f2.5 dist 98cm
Highslide JS
Self portrait Pol type 56 1/30 f8.0

Highslide JS
example 2 Pol type 56 1/500 f2.5 dist 90mm
Highslide JS
The Sony Phone is the only proof this image was shot recently...

Highslide JS
Not so close and stepped down f16 (Flash)
Highslide JS
Comparison: This one was done with a 150mm - Distortion can be noticed.

Highslide JS
Preset II f4.0 Distance 63cm
Highslide JS
Falconer...Is this one taken with the Aero?

Highslide JS
example 3 Pol type 54 PolaPan 1/125 f2.5 Normal range >6 feet - Backlit scene!!!
Highslide JS
...

Highslide JS
"Air France Bear" - D-lux3 f2.8 No Bokeh...
Highslide JS
"Air France Bear" Aero Ektar f2.5 - Is this enough BOKEH?

Highslide JS
Some people are frightened in front of the beast...Not this guy though! Cavalry vet captured by JD (1)
Highslide JS
Cavalry veteran captured by JD (2)


For those who prefer to drive the
FASTLANE...
Choose your desired frame and follow the steps below.


Highslide JS
This is preset I 45cm
Highslide JS
This is preset II 65cm
Highslide JS
This is preset I 98cm...
Highslide JS
Else about 120cm
PRESET I
Distance 45cm
Covered area H 0.191m x V 0.153m Correction 1.4 stops down or multiply your time by 2.65.
PRESET II
Distance 65cm
Covered area H 0.331m x V 0.265m Correction 1.1 stops down or multiply your time by 2.13.
PRESET III
Distance 98cm
Covered area H 0.563m x V 0.451m Correction 0.7 stops down or multiply your time by 1.67.
..
Distance 120cm
Covered area H 0.718m x V 0.574m
..


Highslide JS
This is preset I 45cm
Click here if you want to contact us.
Looking forward to your comments, suggestions, diatribes and cries for help.
Want us to go on? Donations are welcomed...


JohnD


COPYRIGHT NOTICE:
PUBLISHED PHOTOGRAPHS NOR TEXT MAY USED WITHOUT WRITTEN CONSCENT OF THE AUTHOR.PHOTOGRAPHS MAY NOT BE CROPPED, RETOUCHED OR AIRBRUSHED IN ANY WAY WITHOUT THE PERMISSION OF JOHN D. PHOTOGRAPHY.ALTERING THESE PHOTOS WITHOUT PERMISSION WILL RESULT IN CHARGES FOR DAMAGED PHOTOGRAPHS.THERE WILL BE WHATSOEVER NO CAPTURING, RESAMPLING, SCANNING, DIGITISING OR STORAGE OF IMAGES ON A RETRIEVAL SYSTEM WITHOUT THE WRITTEN CONSENT OF THE AUTHOR. THE NATURE OF THE CAPTIONS MUST BE RESPECTED.ALL THESE PHOTOGRAPHS ARE COPYRIGHT OF JOHN D.PHOTOGRAPHY & JOHND.ESQ © 1999,2007


This page is part of "The MasterSite for the larger camera"