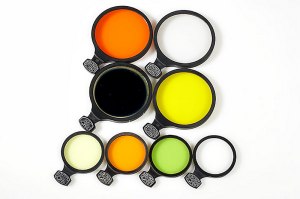
Slip-in Filters Ø 51mm - Ø 71mm. |
My view on filters...
While there is no prejudice against using filters per se, the use of filters is often unfamiliar,overlooked,forgotten or ignored.
This should not be the case, especially not with B&W photography. The two most important filters with B&W photography are the yellow and polarizer filter.
If you're doing B&W photography exclusively don't get caught without carrying at least 3 filters - K1, K2 and a polarizer filter.
Not having one or using one is most of the time caused by the difficult or cumbersome mounting of the filters:
The problem is caused by the different diameters of our lenses. Ideal would be to have one set of filters for all our lenses. We can heartily recommend the Linhof universal sunshade (see photographs of lens-shade mounted cameras) and filter adapter. Lenses from 32 -70mm can be used and thus we need one size of filters.
A little more difficult is to get filters for the Aero Ektar due to its front size diameter. A solution can be to mount filters on the back when needed. Just tape it...
Also gelatine filters will do the trick and believe me the results are much improved by using a yellow or orange filter.
Don't forget to compensate the exposure with the filter factor. (See also our formulas page)
|
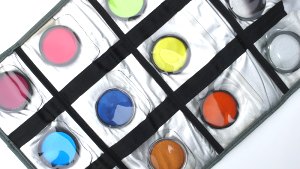
Misc Filters... |
Contrast Filters.
The first and most common use for filters among photographers is their use for correction - to secure natural monochromatic rendering of colored objects.
There is another use for filters in which they serve an exactly opposite purpose. Often it becomes necessary to photograph a subject containing objects of different hues but similar brilliance.
To the eye, which regognizes the difference in hue, such objects are clearly separated, but on the film, which is sensitive only to differences in brilliance, they may blend into one another. In such case there is no possible way of securing a photograph that looks "natural" and at the same time gives a clear rendition of the objects in the composition. When this situation arises it is often become advisable to sacrifice naturalness for the clarity which may be achieved through the use of a contrast filter.
To use contrast filters effectively the photographer must know two things. First, he must be able to judge how any particular scene or subject "Looks" to the film he is using.
This requires a very close acquaintance with the film's characteristics, especially its sensivity to the various colors of the spectrum. Secondly, he must learn to see the scene he is photographing as the film sees it, disregarding the presence of color.
This is not easy task and requires considerable experience and study before proficiency is acquired. Many experienced photogs prefer not to depend entirely upon their judgement in this matter, but use a viewing filter which minimizes the effect of color so that differences and similarities in brilliance may be more easily recognized.
If such a viewing filter is not available, it often helps to examine the scene through a pair of dark sunglasses.
|
|
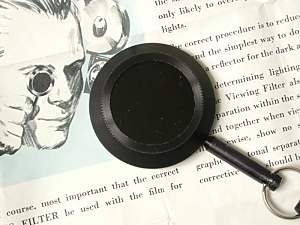
Visualizing - Difficult as we see color all the time in real life.
Solution: The Panchromatic viewing filter
Panchromatic Viewing Filter #1. Besides determining lighting contrast, the Panchromatic Viewing Filter also shows the effective tonal separation within the scene. Color that seem to blend together when viewed through the Filter will, likewise, show no separation when photographed. If tonal separation is desired a suitable corrective filter should be used on the camera lens.
The Viewing filter is a great help to determine zones and contrast as well.
Nowadays available through TIFFEN and SPECTRA.
|
|
Viewing filter II.
Solution: How does it work?
Click on the image on the left to see the Mouseover version.
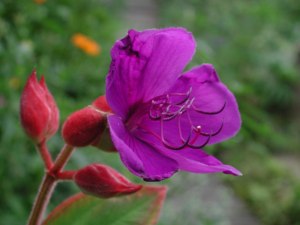
In the first image the flower stands out very well against the background. This will look very different if you use Panchromatic film.
Note the bright colors that blend with the background. Without correction the photograph would look very dull indeed!
Besides determining lighting contrast, the Panchromatic Viewing Filter also shows the effective tonal separation within the scene. Colors that seem to blend together when viewed through the Filter will, likewise, show no separation when photographed. If tonal separation is desired a suitable corrective filter should be used on the camera lens.
In practice you hold the filter for your eye while looking and studying the zones and contrast.
As the eye adapts very quickly, move the filter in front and away from the eye at short intervals.
|
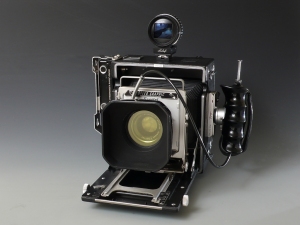
Speed Graphic with Linhof lens-shade and Light yellow filter. | |
You will soon notice the K2 filter is the one you don't want to miss...
The standard filter you are required to use on all outdoor photos is a yellow, also called a K2, Yellow 12 or Y48. It is mandatory because most b/w films see way too much blue and ultraviolet, and render these colors much brighter than they appear to our eyes. Without a filter the blue of the sky looks as bright as the white clouds! A yellow filter makes b/w photos look just about natural.
For a stronger effect use an orange (O56) filter, or a red (R60 or 25A) filter. Red will darken a sky even more! For a really scary dark sky use a red and a polarizer at the same time. |
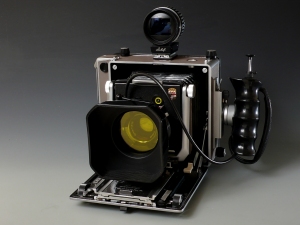
Super Technika 45 with Linhof lens-shade and K2(yellow) filter mounted. | |
The Polarizing filter is a good second choice, eventually combined with a K2.
Polarizers are two part lenses that rotate, allowing you to select the degree of additional saturation, contrast and glare reduction desired.
Polarizers are most useful for increasing general outdoor color saturation and contrast. Polarizers can darken a blue sky, a key application, on color as well as on black-and-white film, but there are several factors to remember when doing this. To deepen a blue sky, it must be blue to start with, not white or hazy. Polarization is also angle-dependent. A blue sky will not be equally affected in all directions. Generally, as you aim your camera either more into or away from the sun, the effect will gradually diminish. There is no effect directly at or away from the sun. Do not pan with a polarizer, without checking to see that the change in camera angle doesn't create undesirable noticeable changes in color or saturation. Also, with an extra-wide-angle view, the area of deepest blue may appear as a distinctly darker band in the sky. Both situations are best avoided. In all cases, the effect of the polarizer will be visible when viewing through it.
Polarizers need approximately 1-1/2 to 2 stops exposure compensation, usually without regard to rotational orientation or subject matter. |
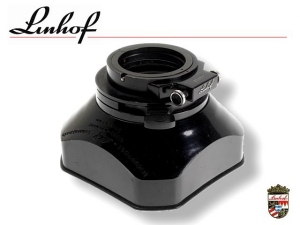 | |
Lens-shade.
Many photographers think a lens shade is unnecessary except when shooting directly against the sun. That this is a mistake can be proved by making a test.
Point your camera away from the sun and make an exposure. Then mount a lens shade and make another shot without changing either the lens opening or the time. Develop these negatives together and make prints, using the same printing and developing time for each negative. You will find the print from the shaded negative has more snap, the amount of the difference depending on the presence or absence of stray light sources or reflecting surfaces near the camera at the actual picture making. Further evidence of the importance of the lens-shade is that professional cinematographers practically never shoot without one!
Our conclusion: Use a lens-shade at all times!
|
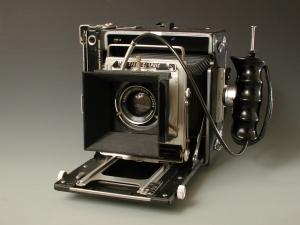
Kodak Pathé's porte-filtre Professionnel No.2 | |
Lens-shade.
If you're using gelatine filters the Kodak Pathé's porte-filtre Professionnel No.2 for large format might be the solution.
Very universal though a little less sophisticated than the Linhof - shade.
|
Continued...

G E T L E V E L N O W



 Legal!
 About
About
 Whois
Whois
 Aldis
Aldis
 Aero Project
 The Workout
 Memorandum
 Encounter...
 Graflens
 Lenses+
 Holes+
 My Pacemaker SG's
 Books
Books
 Graflinks
 Speedlights
 Gallery
 WICF
WICF
 Contact
 Filmholders
 Start Page
 Whatsnew


