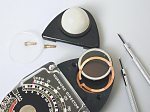
 Director and Brockway M-2 series:
Move your mouse over the image to see a larger one...
Cleaning the inside and the protective glass cover. Checking out the pressure of the contact rings. Reassembling the meter. Zero correction adjusted!
Checking under miscellaneous light conditions against a Sekonic L-398.
Calibration: No need.
Discrepancies if any: Not Found!
Conclusion: Meter is dead-on and ready to go!!
To be sure I did another one NorWood Director type C NR:48753 ...
Discrepancies if any: Not Found! Meter responded 100% against my L-398.
Both Meters are 100% functional again..!
Order CELL
|


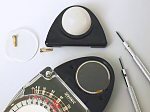
 Type S series:
Move your mouse over the image to see a larger one...
This type of meter is a little more difficult, because you need to desolder, clean the contacts and resolder again!
Very important again is to use the proper tools. The soldering iron should not become too hot!(Max 25-30Watt)
You need good eyes or a loupe to see you that you apply minimal tin. After soldering the leads, you have to insulate the black lead contacts to prevent shorting.
(You could try silicon gel)
The red lead is not necessary as it has to make contact with the bottom part anyhow.
Carefully place the cell back in its position not forgetting the metal spring clip (Must be placed underneath the cell.)
Clean the glass protection cover and replace it on top of the cell, next reassemble the top housing and secure the screws.
Testing:
Checking under miscellaneous light conditions against a Sekonic L-398.
Calibration: No need.
Discrepancies if any: Not Found!
Conclusion: Meter is dead-on
Finally some cosmetics...apply lacquer paint to cover the holes of the screws....
Happy metering and remember:
You could be the light meter wizard on the block with your own resuscitated Director!
Order CELL Look for B-29 with leads!!
|

:::::: Simultaneous measuring L-28c & L-398 ::::::
or
The difference between L-28 and L-398 scale (Foot-candle)
|
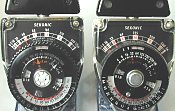
 To prove it once and for all, I decided to make a final comparison of the two meters.
According the Manufacturer the difference was the decision to change the Foot-candle values instead of the f-numbers.
Thus in 1976 as the L-398 Studio Deluxe was modified from L-28C, Sekonic changed Calibration Constant from C=270 to C=340.(Spokesman Sekonic).
But actually the Brockway Studio-S, Sekonic Studio-s, L-28C, L-28c2 were all having a C=25 and NOT
270. See Identification plates
Main purpose of changing calibration constants is to help photographers in getting better results.
If they increased the exposure by a factor f/stop the resulting negative/picture had a better scale. Sofar So good!
More manufacturers did work with K factors or C values..They are free to do so, but you can't play with Foot-Candle numbers.
:::::: THE TEST
::::::
- Test was carried out in my studio with artificial light.
- Both meters with LumiSphere
- Slides in
- Pointers set accordingly
- Photograph made with Flash and CoolPix
I did not see any discrepancies or differences other than THE CHANGED FOOT-CANDLE numbers!
I would like not to comment any further and leave all conclusions to the reader.
Click the image to get it really pointed out..Check ASA, EV, TIME/APERTURE combinations
Case closed.
|

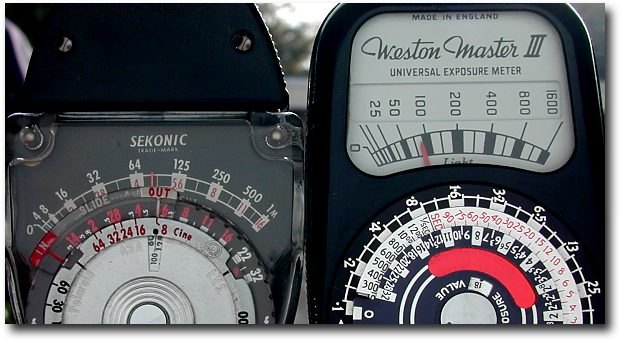
Sekonic Studio -S in action after revision( 6-9-2003)
|
|
Measuring Incident light: Whatis: Keystop?
At the key stop, the correct shutter speed in seconds to expose a given luminance on Zone V [Kodak 18 % Neutral Grey Card], is the reciprocal of the luminance expressed in Cd/ft2 or Foot-Candles.
NOTE:
Actually this is only true on the Sekonic Studio de Luxe scales till model L-28c2 and it will only work with the highslide in.
Checking Speed formula - Simultaneous metering on a sunny cloudy day around 1100 hours - Location Driebergen-R
On the right side a spiffy WestonMaster III with Invercone mounted(high scale) & On the left side Sekonic Studio -S with Photosphere (High slide in).
As the Westonmaster scale is in cd/ft2 and the Sekonic in Foot-candle this does not influence the outcome.!
Note that our formula will work with the WestonMaster in high and low readings as the Sekonic works only in high reading (High slide in).
This is due the scalenumbers on the WestonMaster will change accordingly and the Sekonic scale remains static.
|

Part 1
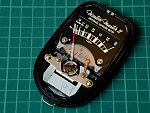
 First dismantle the front and the back of the meter. You have to start at the ID plate, after removing the plate you will find 2 screws, hence they can be special screws and you need a special tool for it.
After removing the front of the meter, cover the back again with its housing...!
Unfortunately, you have to remove the back to get to the front.
Watch out for two little pins on top, they will come loose, also note there will be a little spring on the bottom of the front plate, it can easily jump away and give you a headache!
If you came this far, See part 2
|
Part 2
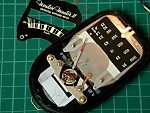
 You will have a good view on the scales right now, They have to be removed, starting with the static one. Unscrew the two nuts, taking care of not to touch the needle!
Find the right angle to lift the scale off over the remaing bolts. Put it on the side with the two nuts and the washers.
What we see now is the moving slider, on the end of the legs there are two tiny holes.
This is where the springs of the baffle are mounted, carefully lift the two sliderlegs so that the springs come out!
Now use all common sense you have to remove this part without touching the needle.
|
Part 3
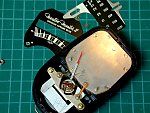

Next after removing the slider disengage the earthing terminal by removing the nut.
Now we are ready to unscrew 6 flatheadscrews and the one panheadscrew left of the earthing terminal.
Carefully slide the cover/contact cell to the top and lift it off.
|
Part 4
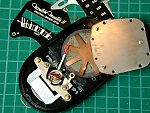
 After sliding over the cover/contactcell plate we will see a starlike pressure plate holding the cell flat to the contact spring assembly.
With a tweezer pull it out gently, again beware of the needle(This is a very delicate item).
|
Part 5
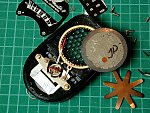
 Now put your finger under the meter in the window and give a little pressure.
Both the cell and the plastic disk with lenses(FYI The Weston Masters have a disk with 55 moulded lenses on it) will come up, take the cell out, leave the grid rest again together with the contact spring assembly.
Sofar so good..!
|
Part 6
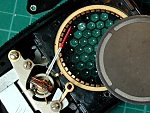
 Now is the time to get your new cell, seen here with its contactring all around, check it is clean and put it on top op the contactspring assembly.
Turn the cell around so that the contactring goes face down.
You should see the back with markings (+).
From here you have to put everything back in place in reverse order.
|
Part 7
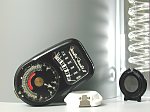
 If the whole operation was successfull, your meter should look like this and the needle will move.
The reassembling is not an easy task especially the two bafflesprings can be tricky. Also the Zero adjustment screw needs some patience.
After all, I have said it before "It is not for the faint of heart"
If you really have a beauty of a meter you want to resuscitate, we advise you to practice on an ugly one beforehand, better for your piece of mind also!
|
*****

 AIM HIGHER. TRY HARDER. MAKE IT DO SOMETHING!
Until then, take two aspirin, get plenty of rest, and one or two MM won't hurt.
|

Inside Models III

 Replacing cells can be done, however Calibration is another story..
Back in those days when the WestonMaster series came to life, the Selenium photo-voltaic cells produced had not consistent characteristics.
At one time in manufacturing the Weston Master meters, use was made of several scales with different spacings and the most appropriate of these were fitted to individual meters.
Nowadays it is possible to make Selenium cells with very consistent characteristics. A good exposure meter is accurate to about 1/6 of a stop. Lightwise this is a tolerance of about plus or minus 10%, which is trivial in practical photography.
|
MODEL III USA
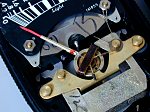
 As you have seen, the meters differ. Most important in these III series between the USA model and the GB model is the connection of the earthing terminal lead.
The USA model goes directly to the CellCover whereas the GB model goes through a lead with a resistor.
|
MODEL III GB
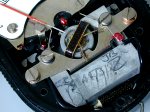
 Here you can see just below the magnet the resistor tucked away. It is not hard to imagine that calibration can be tricky.
You should be aware of this. Replacing the cell does not guarantee a fully trustworthy meter.
If you solved these problems and want to help others, you are kindly encouraged to tell us...
|

Weston late..


| If you want to try to resuscitate an elder meter, we advise you for practical reasons to concentrate on the models IV and later.
The earlier models had no needle lock what is quite cumbersome...
The numbers on the scales were with old f-numbers and shuttertimes and are hard to read also.
An exception might be the WestonMaster III with his own appeal.
|

Modded cones

 Can the newer Invercone be used for the Earlier Masters?
These questions come in very often from proud owners of a nice Model II or III.
Yes, this is possible...but you need to mod it!
This is a good solution as the original Invercones are rare nowadays. They were sold seperately.
As you can see the original has an opening of about 3mm, this should be about 5.5mm.
So you need to file some off, do this secure and try the fit regularly..
Finally on the other side (The metal pressure plate are two notches on top.)
They need a few strokes also! (Keep trying the fit) as too far will spoil all..
Good luck! When fitted properly this invercone works less cumbersome as the original!
|
Invercones
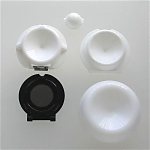
 All possible Invercones for the WestonMaster Series
Starting bottom left corner:
- Multiplier Weston Master I-II III
- Invercone Weston MASTER I-II-III
- Invercone Weston Ranger 9
- Invercone Weston Master IV
- Invercone All later models!
|

approved!
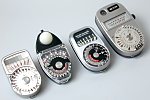
 Can the elder meters be trusted....?
Has Pinnochio wooden balls?
As the light intensity did not change over the years and this meters are revised and tested the answer is simply YES
Depending on the subjectmatter, one of those will do the job!
The only light sources I can't use them are Studio-lights(Flash) and strobes, so these situations will call for my Minolta IV.
|
Meterless F
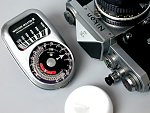
 Just some images...!
Good old Nikon F and Weston Master III
Copyright Notice: All material located on this website is the copyrighted property of John D.Photography and or John D. de Vries
(or as otherwise credited). This includies, but is not limited to, photographs, graphics and text files.
This material may not be sampled, duplicated, reproduced, redistributed or re-transmitted in any form without the written
permission of John D. de Vries/Johndesq Consultancy or their agents. © 2003 - John. D. Photography
|
Meterless F
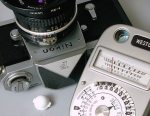
 Just some images...!
Good old Nikon F and Weston Ranger 9
Copyright Notice: All material located on this website is the copyrighted property of John D.Photography and or John D. de Vries
(or as otherwise credited). This includies, but is not limited to, photographs, graphics and text files.
This material may not be sampled, duplicated, reproduced, redistributed or re-transmitted in any form without the written
permission of John D. de Vries/Johndesq Consultancy or their agents. © 2003 - John. D. Photography
|
Meterless F
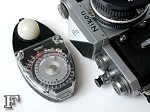
 Just some images...!
Good old Nikon F and Father of all Sekonic descendants.
Copyright Notice: All material located on this website is the copyrighted property of John D.Photography and or John D. de Vries
(or as otherwise credited). This includies, but is not limited to, photographs, graphics and text files.
This material may not be sampled, duplicated, reproduced, redistributed or re-transmitted in any form without the written
permission of John D. de Vries/Johndesq Consultancy or their agents. © 2003 - John. D. Photography
|
Meterless F
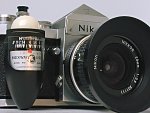
 Just some images...!
Good old Nikon F and Brockway M3. Is it working?
Copyright Notice: All material located on this website is the copyrighted property of John D.Photography and or John D. de Vries
(or as otherwise credited). This includies, but is not limited to, photographs, graphics and text files.
This material may not be sampled, duplicated, reproduced, redistributed or re-transmitted in any form without the written
permission of John D. de Vries/Johndesq Consultancy or their agents. © 2003 - John. D. Photography
|
Meterless F
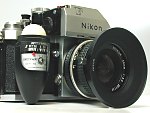
 Just some images...!
Good old Nikon F Photomic TN and Brockway M3. Which one is working?
Copyright Notice: All material located on this website is the copyrighted property of John D.Photography and or John D. de Vries
(or as otherwise credited). This includies, but is not limited to, photographs, graphics and text files.
This material may not be sampled, duplicated, reproduced, redistributed or re-transmitted in any form without the written
permission of John D. de Vries/Johndesq Consultancy or their agents. © 2003 - John. D. Photography
|
Back to top

|



 Welcome at our Test Bench.


 Model II nr:5844328

 First dismantle the front and the back of the meter. You have to start at the ID plate, after removing the plate you will find 2 screws, hence they can be special screws and you need a special tool for it.
After removing the front of the meter, cover the back again with its housing...!


