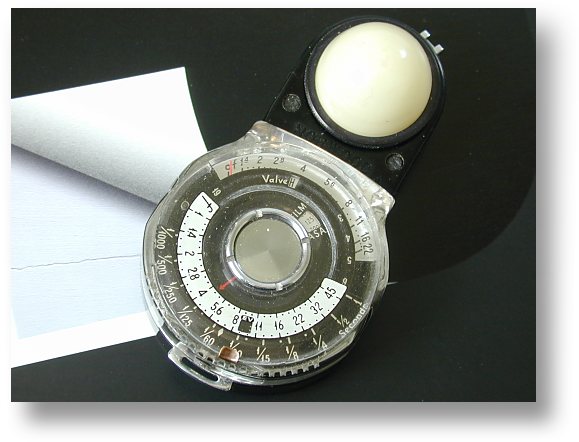
7 steps to correct exposure...
NorWood Super Director (Walz)

  • #1    Adjust the Asa Index setting by turning control crown to show desired ASA or E.I
  • #2    Move Control tab until selected shutter-time is in line with red arrow.
  • #3    Note letter shown in window marked "VALVE"
  • #4    Move the HELIO Valve index to the indicated Valve-letter...
  • NOTE:    Meter is now ready for operation!
  • #5    The 3D Heliosphere should be aimed toward the Camera!
  • #6    The pointer on the meter scale will then directly indicate the correct f-stop to be used on your camera lens.
  •       Just as easy as that! and what's more the resulting picture will have the best possible exposure.
  • #7    Ready for exposure!

NO HelioValve?
or Maximum Sensivity Adjustment

  • #1    Remove HELIOVALVE from meter.
  • #1    Adjust the calculator valve-window to "S"
  • #1    Adjust the Asa Index setting by turning control crown to show desired ASA or E.I
  • #1    Note the f-stop indicated by the meter pointer.
  • #1    Turn the transparent calculator disk until the observed f-stop number is in line with the red arrow.
  • #1    Select on the shutter-time scale the desired shutter-time number.

Note: This meter attains its accuracy because its readings are based solely on INCIDENT LIGHT (The light that falls upon the subject)

Manual S models
Manual later Studio deluxe
Manual Director models
Manual Super Directors
Manual M3


Author  ||| Foot-Candle TEST  ||| History  ||| Identification  ||| Yesterday's Meters  ||| HelioValve  ||| Model M-3  ||| M series   ||| FaQ!!  ||| Wanted!!
 ||| SlideShow  ||| About slides  ||| Condensed Manual Norwood  ||| Condensed manual Brockway/Sekonic-S  ||| Speed reading  ||| Quiz
 ||| Impressum  ||| Friends of ND  ||| New Cell?  ||| Where to buy  ||| E-Mail  ||| CD-ROM